

Click here to know more about the new preview feature of Custom Pages in Model Driven Apps and Canvas Apps.
Click here to know more about the new preview feature of Custom Pages in Model Driven Apps and Canvas Apps.
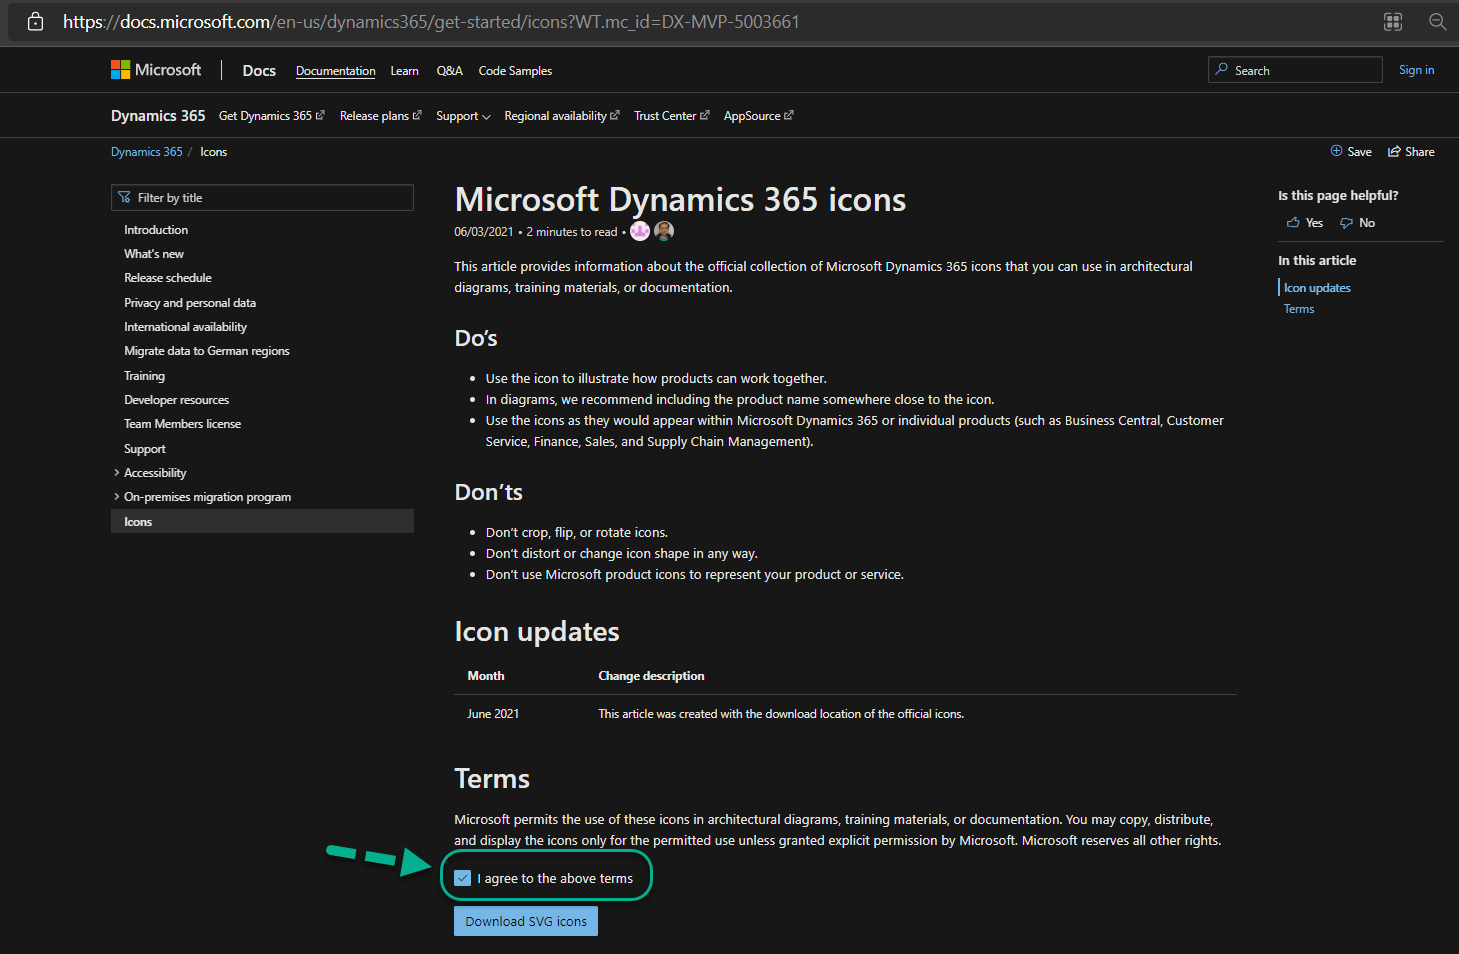
Microsoft Dynamics 365 icons has been released recently by Microsoft.
Follow the below steps to download the icons.
Step 1: Click on the link Microsoft Dynamics 365 icons | Microsoft Docs.
Step 2: On Microsoft Dynamics 365 icons page, Select the I agree to the above terms Check box and click on Download SVG icons.
Step 3: All Dynamics 365 Icons will be downloaded as Zip folder. Unzip it and have a look at all the icons used in Microsoft Dynamics Products.

Hope you have successfully downloaded Microsoft Dynamics 365 icons.
It is quite common for us to Create CRM Trial Version online and do some R & D on it.
By default, we will get 30 days of Trial and If you want to extend the Trial by 30 more days, follow the below steps.
Continue readingWant to become Microsoft Certified: Power Apps + Dynamics 365 Developer Associate?
Then, complete the below 2 certifications.
MB-200: Microsoft Power Platform + Dynamics 365 Core
and
MB 400: Microsoft Power Apps + Dynamics 365 Developer (beta)

Click here and create Dynamics CRM 365 30-days trial version.
Follow the below steps to Share/ Assign Personal Views
Click here to know, How to create Personal Views in CRM?
Now will Share/ Assign the “Important Leads” Personal View, which I created in my Last Post.
Open Advanced Find, Look for: Leads and Click on Saved Views.

Share:
1.You can see the list of all Personal Views for Leads Entity. Select the required Personal View and click on Share button on Ribbon.

2.Click on Add User/ Team to add the required User or Team, for whom you want to share Personal Views.
Click on Add.

3.Give the required permission on this view for the User or Team and click on Share.

Assign:
Click on Advanced Find and select required Entity under Look for and click on Saved Views.
1.Select required view and click on Assign Saved Views.

2.By default, Assign to is set to Me. Select Assign to User or team.

Add the required User or team and Assign.

Thank you for reading this article.
Please leave your valuable feedback.
Follow the below steps to create personal views in CRM,
Step 1: Open CRM and Advanced Find.
Step 2: Now I am going to Create a personal view for Lead Entity.
Select Look for: Lead and give your own criteria.
Here I want to show all Leads, whose Est. Value > 4,000,000.00

Step 3: Now I want to add Est.Value Column in the Results View.

3. Select Est. Value. click on OK.

Click on OK.
Step 4: Click on Results.

Step 5: Will see all Lead records, with Est.Value Is Greater Than 4,000,000.00.

Now we have seen a record meeting our Criteria. Now will Save this Personal View.
Step 6: Click on Advanced Find and Click on Save as shown below.

Step 7: Give some proper Name and Description to this Personal View and Save.

Step 8: This Personal View is available to see in 2 different places.

2. Open Advanced Find, and Select Look for: Lead. Click on Saved Views.

We can see all Saved Views belongs to Lead Entity.

Thank you for reading this Article.
Please leave your valuable feedback.
Follow the below methods to get GUID of the record in Microsoft Dynamics CRM,
Method 1:
Open any record and Click on EMAIL A LINK Ribbon button.
Record URL will be opened in Outlook Email and record GUID will be identified easily with Query String parameter id and look likes below,
id=%7b<32 bit GUID>%7d

Method 2:
Open the required record, and click on Pop Out Symbol.

The Record will be opened in a new Tab/ Window.
Record GUID will be identified in the URL as shown below,

Method 3:
This method is totally Interesting, you will feel easy to get CRM record GUID on a single click using Google Chrome.
Follow the below steps,

4. Copy & Paste the below JS Code under URL,
javascript: if (window.prompt(“CRM Record GUID is :”, $(“iframe”).filter(function () { return ($(this).css(‘visibility’) == ‘visible’) })[0].contentWindow.Xrm.Page.data.entity.getId().slice(1, -1))) { }
Note: Before Copy and Paste the above code, replace Double Quotations and Single Quotations properly.
Save the Bookmark.

5. Click on Bookmark, you created “CRM Record GUID“. Pop Up will be displayed with CRM Record Id of the Record you opened.

Method 3 information is from Blog CRMBlocks.
Please leave your valuable feedback on this article.
Follow my article to Configure OneDrive for Business in CRM 2016 Online.
System Administrator can Grant/ Revoke access to OneDrive for Business feature in Online CRM, using “OneDrive for Business” Privilege.
Go to Microsoft Dynamics CRM -> Settings -> Security -> Security Roles
Open the required Security Role and Click on Core Records Tab -> Miscellaneous Privileges.
Click on OneDrive for Business to give access (Full Green) and Click on it again to revoke access (White) and Save.

Follow the below steps to configure OneDrive for Business in CRM 2016 Online.
Go to Settings -> Document Management and click on Enable OneDrive for Business.
After Click on OK, we can see the below message,
“OneDrive for Business relies on server-based SharePoint integration. To use this feature, enable server-based integration and have at least one active SharePoint site.”
Which means, we should Enable Sharepoint in CRM, before using OneDrive feature in CRM Online.

Follow the below steps to configure OneDrive for Business,
Step 1: Click here and follow my previous article to configure Office 365 Enterprise E3 Trial Subscription and Assign Product License to the required user.
Step 2: Next, we should configure SharePoint Online with CRM.
Click here and follow my previous article from Step 6 to Step 20 to configure.
Skip Step 7 – How to Integrate Dynamics CRM and Share Point Online and follow the below steps,

3. Copy the OneDrive Link and use this link to Configure SharePoint with CRM as mentioned in my previous article Step 14 – How to Integrate Dynamics CRM and Share Point Online.

Step 3: Once Step 2, successfully configured,
Go to Microsoft Dynamics CRM -> Settings -> Document Management. Follow the below steps

Successfully Configured OneDrive for Business in CRM.
Step 4: Now we will upload a sample file and Test OneDrive Integration with CRM.
Go to Microsoft Dynamics CRM -> Service -> Accounts and open any existing Account record.
Click on Documents under Account record.

Step 5: Under Document Associated Grid,

Step 6: We can see the File in Document Associated Grid and Go to More Commands and click on Open Location to see the Physical Location of the File.


Thank you for reading this Article and hope you have successfully Integrated and Tested OneDrive for Business with Microsoft Dynamics CRM.
Please leave your valuable comments on this Article.