

In this XrmToolBox series, in the first two articles i have explained about,
Now, in this article, I am going to explain about how to install Tools in XrmToolBox.
Follow the below steps for Installing FetchXML Builder Tool.
Step 1: Launch XrmToolBox.
Step 2: You can see the list of all available Tools in the XrmToolBox Tool Library.
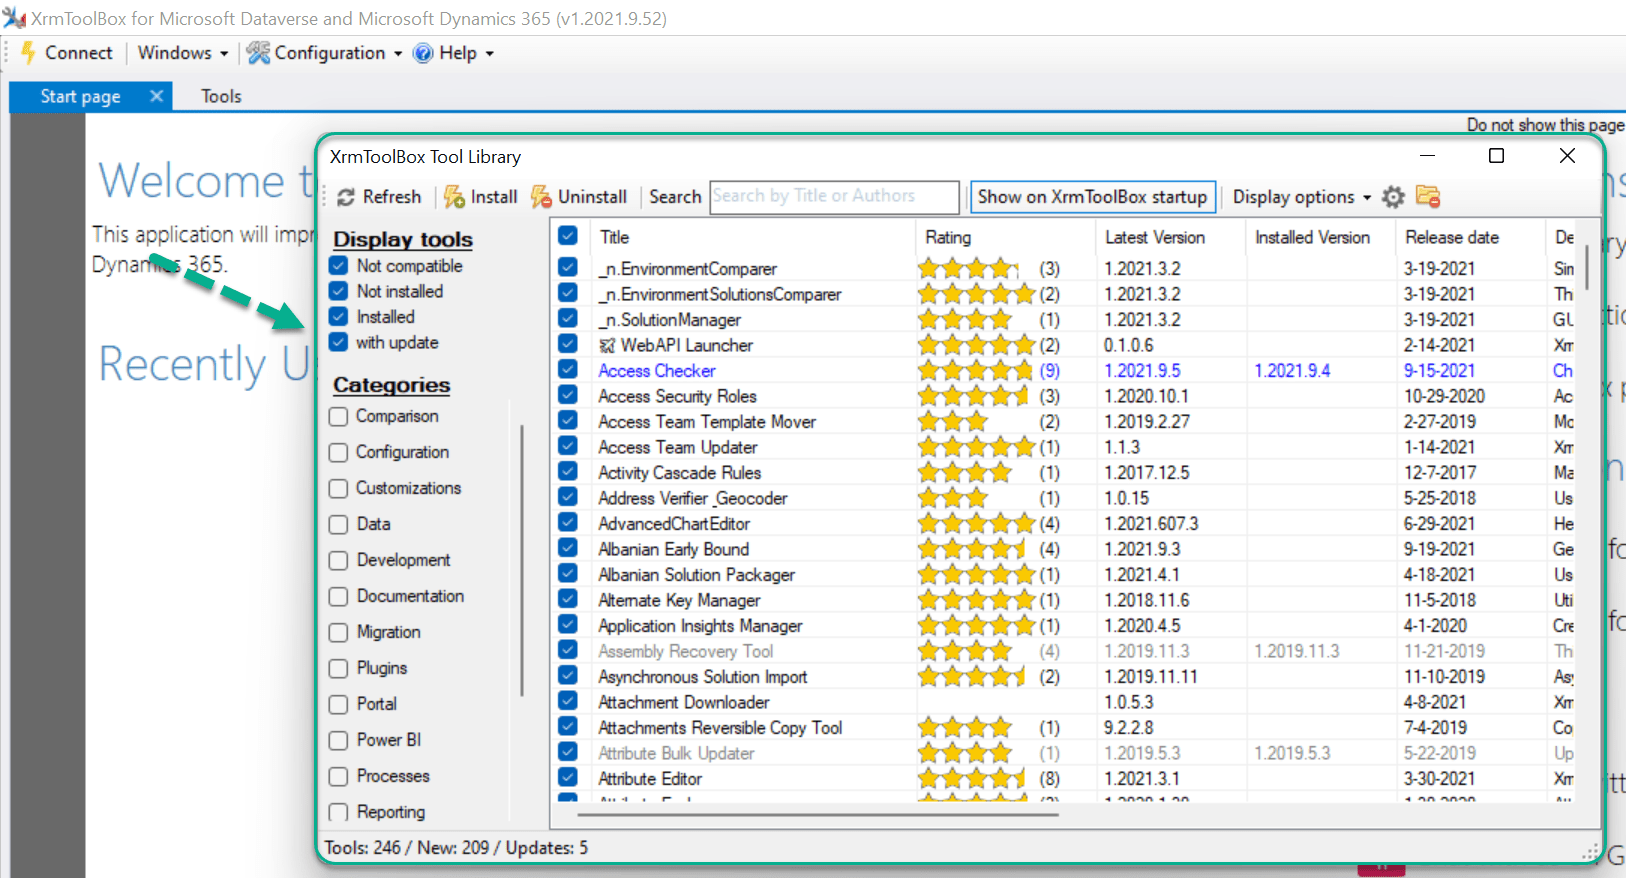
Step 3: Click on Check button in the header to Uncheck all the Tools and will select only the required Tool(s) to Install.

All the Tools are UnChecked now.

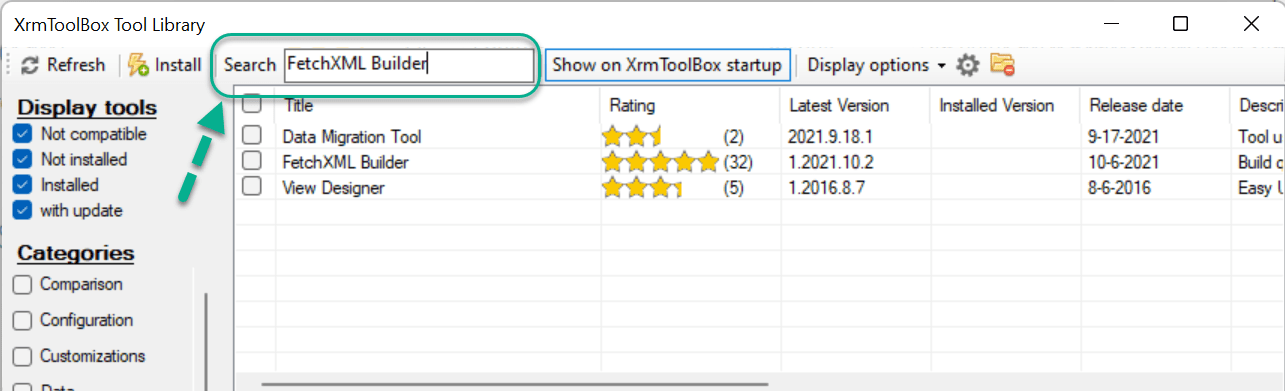
Step 4: Enter “FetchXML Builder” text in the Search Textbox to get the required Tool in the XrmToolBox.
Step 5: Select the FetchXML Builder Tool and Click on that row to see the Description of the Tool.
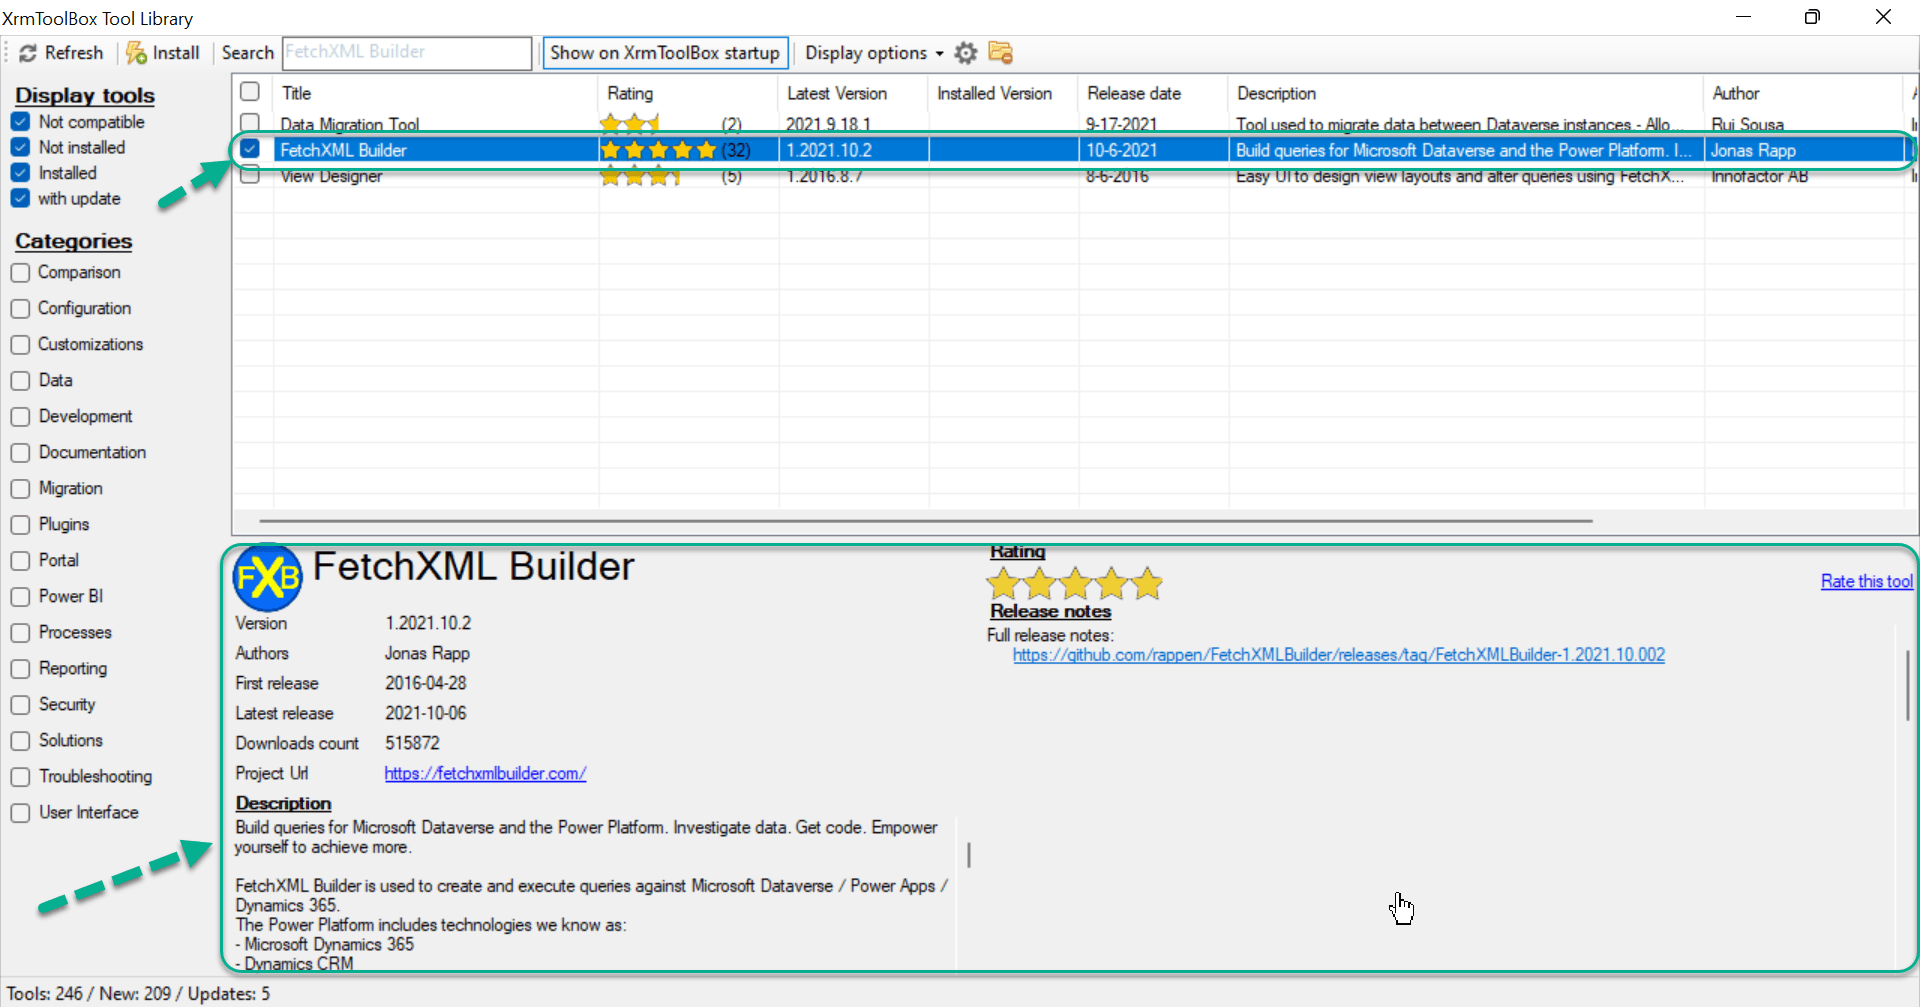
Step 6: Click on Install.

Note: If you want to Install multiple Tools at a time, select all the required Tools and Click on Install.
Step 7: Once the Installation is successful, you can see the below message and also, the Tool will be greyed out.

Step 8: Close XrmToolBox Tool Library window.

Step 9: Go to Tools and provide “FetchXML Builder” in the Filter Text box to see the installed Tool.

Step 10: Click on the Tool to launch it.
Hope you have successfully installed “FetchXML Builder” tool in XrmToolBox.
Please share your valuable feedback on this article.
Discover more from Arun Potti's Power Platform blog
Subscribe to get the latest posts sent to your email.
[…] How to Install a Tool in XrmToolBox? […]
[…] How to Install a Tool in XrmToolBox? […]
[…] How to Install a Tool in XrmToolBox? […]