Calculate difference between Actual Start & Actual End in Minutes

Task: Calculate difference between Actual Start Date & Actual End Date in minutes and Setvalue in Duration field onSave of Phone Call entity

Solution: Follow the below steps,

Step 1: Create Javascript Webresource “new_phoneCallJscript”. Copy and paste the below code in Javascript Webresource,

Step 2: Call the function calculateDurationinMinutes onSave of phonecall entity

function calculateDurationinMinutes() {
var actualStartObj = Xrm.Page.getAttribute("actualstart");
var actualEndObj = Xrm.Page.getAttribute("actualend");
var durationinMinutesObj = Xrm.Page.getAttribute("actualdurationminutes");
    if (actualStartObj != null && actualEndObj != null && durationinMinutesObj != null) {
       var actualStart = actualStartObj.getValue();
       var actualEnd = actualEndObj.getValue();
         if (actualStart != null && actualEnd != null) {
            var dateDifference = Math.abs(actualEnd - actualStart);
            var durationInMinutes = Math.floor((dateDifference / 1000) / 60);
            durationinMinutesObj.setValue(durationInMinutes);
         }
     }
 }

Step 3: Save and Publish the Phone Call Activity. Open any Phone Call record and Select the value Actual Start and Actual End and click on Save to see the result in Duration field.

Please provide your valuable feedback on this article.

FetchXML Formatter Tool

It is a Light weight windows application and this tool will be helpful when you are extensively working with FetchXML in Javascript / C# code to get desired result.

Functionality:

It will take FetchXML from Advance Find as an input and convert that into desired format, which can be used into Javascript / C# for further coding.

Pros:

  1. No Need to spend time for FetchXML formatting
  2. It is easy to use.
  3. Works for both Javascript and C# code

Example:

Let us take a simple example of the below FetchXML,

 <fetch version="1.0" output-format="xml-platform" mapping="logical" distinct="false">
  <entity name="contact">
    <attribute name="fullname" />
    <attribute name="telephone1" />
    <attribute name="emailaddress1" />
    <attribute name="contactid" />
    <order attribute="fullname" descending="false" />
    <filter type="and">
      <condition attribute="ownerid" operator="eq-userid" />
      <condition attribute="statecode" operator="eq" value="0" />
    </filter>
  </entity>
</fetch>

Provide this as an input to FetchXML formatter Tool, 1. Check Javascript radio button and click on Format to see the below output,

"<fetch version='1.0' output-format='xml-platform' mapping='logical' distinct='false'>"+
"  <entity name='contact'>"+
"    <attribute name='fullname' />"+
"    <attribute name='telephone1' />"+
"    <attribute name='emailaddress1' />"+
"    <attribute name='contactid' />"+
"    <order attribute='fullname' descending='false' />"+
"    <filter type='and'>"+
"      <condition attribute='ownerid' operator='eq-userid' />"+
"      <condition attribute='statecode' operator='eq' value='0' />"+
"    </filter>"+
"  </entity>"+
"</fetch>"

2. Check C# radio button and click on Format to see the below output,

@"<fetch version='1.0' output-format='xml-platform' mapping='logical' distinct='false'>
  <entity name='contact'>
    <attribute name='fullname' />
    <attribute name='telephone1' />
    <attribute name='emailaddress1' />
    <attribute name='contactid' />
    <order attribute='fullname' descending='false' />
    <filter type='and'>
      <condition attribute='ownerid' operator='eq-userid' />
      <condition attribute='statecode' operator='eq' value='0' />
    </filter>
  </entity>
</fetch>"

Click Here to download the FetchXML Formatter Tool Exe file

Screen Shots:

FetchXMLFormatter - Pic 1
FetchXMLFormatter - Pic 2
FetchXMLFormatter - Pic 3
FetchXMLFormatter - Pic 4
Please provide your valuable feedback on this article.

Retrieve records using Fetch XML & Java Script in CRM 2011/13

Task: Retrieve Arun Potti Business Phone on onload of Contact record in Contact Entity using FetchXML & Javascript

Solution:

Step 1: Goto http://xrmsvctoolkit.codeplex.com/, and download the Zip folder. Unzip XrmServiceToolkit the folder.

Step 2: Open the XrmServiceToolkit folder, you can find the below Javascript files.

FetchXML - Pic 1

Goto Microsoft Dynamics CRM –> Settings –> Customization –> Webresources.

Create jquery, json2 and XrmServiceToolkit javascript webresources. While creating web resources browse for the respective files and provide the path of XRMServiceToolkit.

Step 3: Add all 3 files to the contact entity,

FetchXML - Pic 2

Step 4: Goto Microsoft Dynamics CRM –> Sales –> Contacts, click on Advance find button. Create new criteria as shown below by clicking on New button,

FetchXML - Pic 3

Step 5: Click on Download Fetch XML button, to get FetchXML code. You can see the below XML,

<fetch version="1.0" output-format="xml-platform" mapping="logical" distinct="false">
  <entity name="contact">
    <attribute name="fullname" />
    <attribute name="telephone1" />
    <attribute name="contactid" />
    <order attribute="fullname" descending="false" />
    <filter type="and">
     <condition attribute="fullname" operator="eq" value="Arun Potti" />
    </filter>
  </entity>
</fetch>

Step 6: We have to change the format of the above FetchXML to use in Javascript.

Use FetchXML Formatter Tool to modify the format.

To Know more about FetchXML Formatter Tool click Here

After modifying its looks like the below,

"<fetch version='1.0' output-format='xml-platform' mapping='logical' distinct='false'>"+
"  <entity name='contact'>"+
"    <attribute name='fullname' />"+
"    <attribute name='telephone1' />"+
"    <attribute name='contactid' />"+
"    <order attribute='fullname' descending='false' />"+
"    <filter type='and'>"+
"      <condition attribute='fullname' operator='eq' value='Arun Potti' />"+
"    </filter>"+
"  </entity>"+
"</fetch>"

Step 7: Now create new_contactJscript Webresource and paste the below code,

function contactOnload() {
 var contactFetchXML = "<fetch version='1.0' output-format='xml-platform' mapping='logical' distinct='false'>"+
 "  <entity name='contact'>"+
 "    <attribute name='fullname' />"+
 "    <attribute name='telephone1' />"+
 "    <attribute name='contactid' />"+
 "    <order attribute='fullname' descending='false' />"+
 "    <filter type='and'>"+
 "      <condition attribute='fullname' operator='eq' value='Arun Potti' />"+
 "    </filter>"+
 "  </entity>"+
 "</fetch>";
var contactRecords = XrmServiceToolkit.Soap.Fetch(contactFetchXML);
if (contactRecords.length > 0) {
 if (contactRecords[0].attributes.telephone1 != undefined)
   alert(contactRecords[0].attributes.telephone1.value);
  }
}

Step 8: Add the new_contactJscript Webresource to Form Libraries on contact Form, and add the contactOnload function to Onload Event,

FetchXML - Pic 5

Step 9: Click on Ok. Save & Publish the contact Entity.

Step 10: Open the existing contact record to see the below pop up,

FetchXML - Pic 6


← Back

Thank you for your response. ✨

Enable / Disable Header Field on CRM form 2013

To access header fields using JavaScript, use header keyword before field schema name.

To Disable Or Readonly:

Xrm.Page.getControl("header_<schemaname>").setDisabled(true);

To Enable:

Xrm.Page.getControl("header_<schemaname>").setDisabled(false);

Hope it helps 🙂

← Back

Thank you for your response. ✨

Get Logged In User Security Roles using Javascript OData 2013

Using OData, will see an example to retrieve Security Roles of Logged In User.

Task: Retrieve Logged In User Security Roles on Onload of Contact Entity

Solution:

Step 1: Include Json2 web resource in the Contact Entity.

If you don’t have this file, download Latest SDK and go to below path and create,

\CRM SDK\SDK\SampleCode\JS\RESTEndpoint\JavaScriptRESTDataOperations\JavaScriptRESTDataOperations\Scripts

Step 2: Create new JavaScript web resource (Ex: new_contact) and include the below script,

function getLoggedInUserRoles() {
var Id = Xrm.Page.context.getUserId();
retrieveMultiple("SystemUserSet", "?$select=systemuserroles_association/Name&$expand=systemuserroles_association&$filter=SystemUserId eq (guid'" + Id + "')", getSecurityRoleNames, null, null);
}

function retrieveMultiple(odataSetName, filter, successCallback, errorCallback, _executionObj) {
var context = Xrm.Page.context;
var serverUrl = context.getServerUrl();
var ODATA_ENDPOINT = "/XRMServices/2011/OrganizationData.svc";

//odataSetName is required, i.e. "AccountSet"
if (!odataSetName) {
alert("odataSetName is required.");
return;
}

//Build the URI
var odataUri = serverUrl + ODATA_ENDPOINT + "/" + odataSetName;

 //If a filter is supplied, append it to the OData URI
if (filter) {
odataUri += filter;
}

//Asynchronous AJAX function to Retrieve CRM records using OData
$.ajax({
type: "GET",
async: true,
contentType: "application/json; charset=utf-8",
datatype: "json",
url: odataUri,
beforeSend: function(XMLHttpRequest) {
//Specifying this header ensures that the results will be returned as JSON.
XMLHttpRequest.setRequestHeader("Accept", "application/json");
},
success: function(data, textStatus, XmlHttpRequest) {
if (successCallback) {
if (data && data.d && data.d.results) {
successCallback(data.d.results, textStatus, XmlHttpRequest);
} else if (data && data.d) {
successCallback(data.d, textStatus, XmlHttpRequest);
} else {
successCallback(data, textStatus, XmlHttpRequest);
}
}
},
error: function(XmlHttpRequest, textStatus, errorThrown) {
if (errorCallback)
errorCallback(XmlHttpRequest, textStatus, errorThrown);
else
errorHandler(XmlHttpRequest, textStatus, errorThrown);
}
});
}

function errorHandler(xmlHttpRequest, textStatus, errorThrow) {
alert("Error : " + textStatus + ": " + xmlHttpRequest.statusText);
}

function getSecurityRoleNames(data, textStatus, XmlHttpRequest) {
var totalCount = data[0].systemuserroles_association.results.length;
var userString = null;
if (totalCount > 0) {
userString = "User Role : ";
for (var i = 0; i < totalCount; i++)
userString = userString + data[0].systemuserroles_association.results[i].Name + "\n";
alert(userString);
} else
alert("No Role Associated with LoggedIn User");
}

Step 3: Add new_contact Jscript web resource in the Contact Entity. Add getLoggedInUsersRoles function on Onload of Contact.

Contact Form Webresource

Step 4: Click on Ok. Save and Publish Contact Entity.

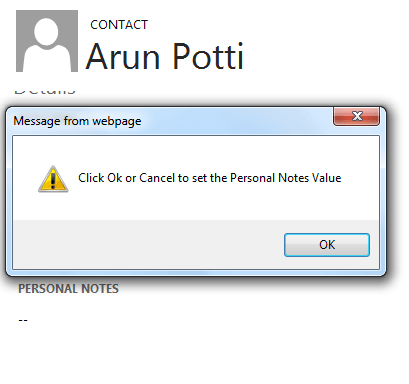
Step 5: Open any Contact record and see the below Popup.

LoggedInUserResult

Please provide your valuable comments on this article.

Alert Dialog and Confirm Dialog in MSCRM 2013 Using Javascript

Especially Alert and Confirm Dialog designed for Mobiles/Tablets replacing window.alert and window.confirm.

It’s a best practice to use the new Syntax for Online/On premise as well.

Alert Dialog: Displays a dialog box like alert.

Syntax:

Xrm.Utility.alertDialog(message,onCloseCallback)
Parameter Name Type Description
message String The text of the message to display in the dialog.
onCloseCallback Function A function to execute when the OK button or Close button clicked.Use null if you don’t want callback.

Example: Set Personal Notes field with some text in Contact Entity Onload after Alert Click on Ok or Cancel/Close

Solution: Copy and paste the below Code in Contact Entity and call showAlertDialog on onLoad

function showAlertDialog() {
    Xrm.Utility.alertDialog("Click Ok or Cancel to set the Personal Notes Value", function() {
        Xrm.Page.getAttribute("description").setValue("alertDialog Fired");
    });
}

Output:

showAlertDialog
After Click on Ok or Cancel,

showAlertDialog Fired

Confirm Dialog: Displays a confirmation dialog box that contains an optional message as well as OK and Cancel buttons.

Syntax: 

Xrm.Utility.confirmDialog(message,yesCloseCallback,noCloseCallback)
Parameter Name Type Description
message String The text of the message to display in the dialog.
yesCloseCallback Function A function to execute when the OK button is clicked.Use null if you don’t want callback.
noCloseCallback Function A function to execute when the Cancel button is clicked.Use null if you don’t want callback.

Example: Set Personal Notes field with some text in Contact entity Onload after Confirm Click on Ok or Cancel/Close

Solution: Copy and paste the below Code in Contact Entity and call showConfirmDialog on onLoad

function showConfirmDialog() {
    Xrm.Utility.confirmDialog("Click Yes or No to set the Personal Notes Value",
        function() {
            Xrm.Page.getAttribute("description").setValue("Yes Callback fired");
        },
        function() {
            Xrm.Page.getAttribute("description").setValue("No Callback fired");
        });
}

Output:

showConfirmDialog
Click on Ok to see the below result,

showConfirmDialog Yes

Click on Cancel or Close to see the below result,

showConfirmDialog No

Please provide your valuable comments on this article.

Notifications in MSCRM using Javascript

It’s a new JavaScript feature in CRM 2013.

setFormNotification

 To Display Form Level Notifications we can use this method. The height of the Notification area is limited. So, every new notification will be displayed on the top. Users can scroll down for the older notifications.

Syntax:

Xrm.Page.ui.setFormNotification(message, level, uniqueId);
Parameter Name Type Description
message String The text of the message
level String The level defines how the message will be displayed.
ERROR : Notification will use the system error icon.
WARNING : Notification will use the system warning icon.
INFO : Notification will use the system info icon.
uniqueId String A unique identifier for the message used with clearFormNotification to remove the notification.

Example: Display all Form Level Notifications on OnLoad of Case entity.

Solution:Copy & Paste the below functions in a JScript Webresource and add the function callFormNotification on Onload

function callFormNotification() {
 setFormNotification("Error Notification", "ERROR", "1");
 setFormNotification("Warning Notification", "WARNING", "2");
 setFormNotification("Information Notification", "INFO", "3");
}
function setFormNotification(msg, msgType, uniqueId) {
 Xrm.Page.ui.setFormNotification(msg, msgType, uniqueId);
}

Output:

Notification Output

clearFormNotification

To remove Form Level Notifications we can use this method.

Syntax:

Xrm.Page.ui.clearFormNotification(uniqueId)
Parameter Name Type Description
uniqueId String A unique identifier for the message used with setFormNotification to set the notification.

Example: Remove error Notification in the above example.

Solution: Copy & Paste the below function in a JScript Webresource and add the function removeErrorNotification on Onload

function removeErrorNotification() {
 clearFormNotification("1");
}
function clearFormNotification(uniqueId) {
 Xrm.Page.ui.clearFormNotification(uniqueId);
}

Output:

clearNotificationOutput

Field Level Notifications:

setNotificaion: To Set Notification at field Level.
Sytax:

Xrm.Page.getControl(fieldSchemaName).setNotification(message);
Parameter Name Type Description
fieldSchemaName String Provide field Schema Name
message String Provide message to display

clearNotification: To Remove Notificaion at field Level

Sytax:

Xrm.Page.getControl(fieldSchemaName).clearNotification();

Please provide your valuable comments on this article.

Show/Hide Navigation Using JScript in CRM

Name Type Description
navItemSchemaName String Provide Navigation Schema name (starts with nav keyword).
Example: navAudit, navDocument etc
VisibleType String Provide Yes (true) or No (false) to Show or Hide Navigation
function showHideNavigation(navItemSchemaName, VisibleType) {
    var objNavItem = Xrm.Page.ui.navigation.items.get(navItemSchemaName);
    if (objNavItem != null) {
        if (VisibleType == "No")
            objNavItem.setVisible(false);
        else if (VisibleType == "Yes")
            objNavItem.setVisible(true);
    }
}

Example:Hide Audit History Navigation in Lead

Solution:Follow the below Steps,
Click on F12 to open Developer Tools and find for the id of Audit History

Hide Audit History

Include the below Code in Javascript Webresource and call in Onload.

function hideAuditHistoryNav() {
    showHideNavigation("navAudit", "No");
}

function showHideNavigation(navItemSchemaName, VisibleType) {
    var objNavItem = Xrm.Page.ui.navigation.items.get(navItemSchemaName);
    if (objNavItem != null) {
        if (VisibleType == "No")
            objNavItem.setVisible(false);
        else if (VisibleType == "Yes")
            objNavItem.setVisible(true);
    }
}

Output:

Please provide your valuable comments on this article.

Set Lookup Value using JavaScript in MSCRM

Syntax:

Name Type Description
lookUpSchemaName String The lookup attribute logical name
entitySchemaName String The logical name of the entity being set.
recordId String A string representation of the GUID value for the record being set.
The expected format is “{XXXXXXXX-XXXX-XXXX-XXXX-XXXXXXXXXXXX}”.
recordName String The text to be displayed in the lookup.
function setLookupValue(lookUpSchemaName, entitySchemaName, recordId, recordName) {
    var lookUpObj = [];
    lookUpObj[0] = {};
    lookUpObj[0].id = recordId;
    lookUpObj[0].entityType = entitySchemaName;
    lookUpObj[0].name = recordName;
    if (Xrm.Page.getAttribute(lookUpSchemaName) != null)
        Xrm.Page.getAttribute(lookUpSchemaName).setValue(lookUpObj);
}

Alternate Method

function setLookupValue(lookUpSchemaName, entitySchemaName, recordId, recordName) {
    Xrm.Page.getAttribute(lookUpSchemaName).setValue([{
        entityType: entitySchemaName,
        id: recordId,
        name: recordName
    }]);
}

Please provide your valuable comments on this article.