

Follow the below steps to create Microsoft Azure Trial Version.
Step 1: Create a new profile in Microsoft Edge or Google Chrome and browse https://portal.azure.com/.
Follow the below article for creating a new Browser profile.
How to login multiple CRM accounts in Microsoft Edge and Google Chrome browser? | Arun Potti’s MS CRM blog
Step 2: Sign in with your Dynamics 365 30 Days Trial Version’s User Id and Password.
or
Create a new Account in Azure.
In this illustration, i have used my existing Dynamics 365 30 Days Trial Credentials.
If you want to create Dynamics 365 30 days trial, Follow this article How to create Microsoft Dynamics 365 30 days Trial instance? | Arun Potti’s MS CRM blog
Step 3: Provide your User Id and Click on Next.
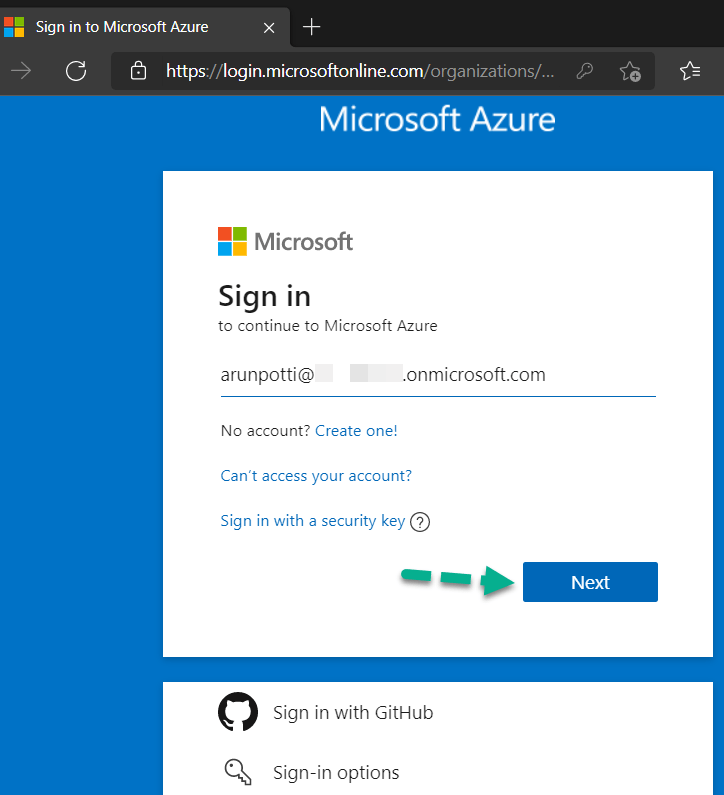
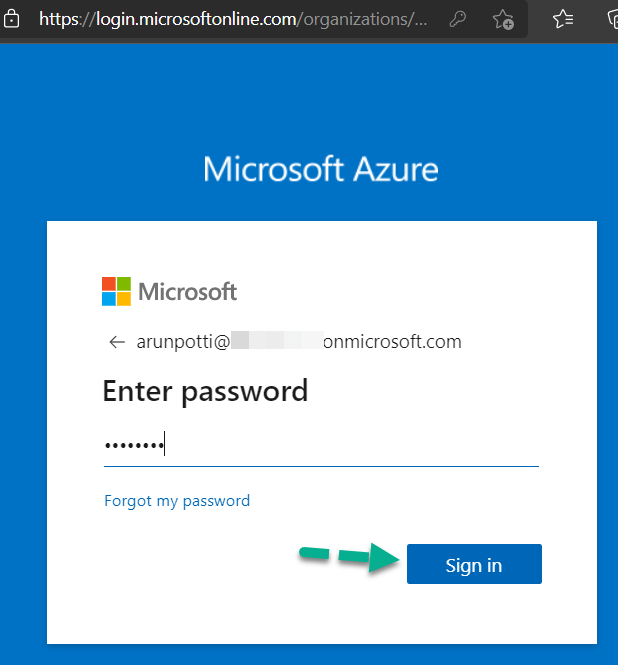
Step 4: Provide your Password and Click on Sign in.
Step 5: After Successful Login, you will be navigated to the below screen.
Click on Start to Start your Azure free trial.
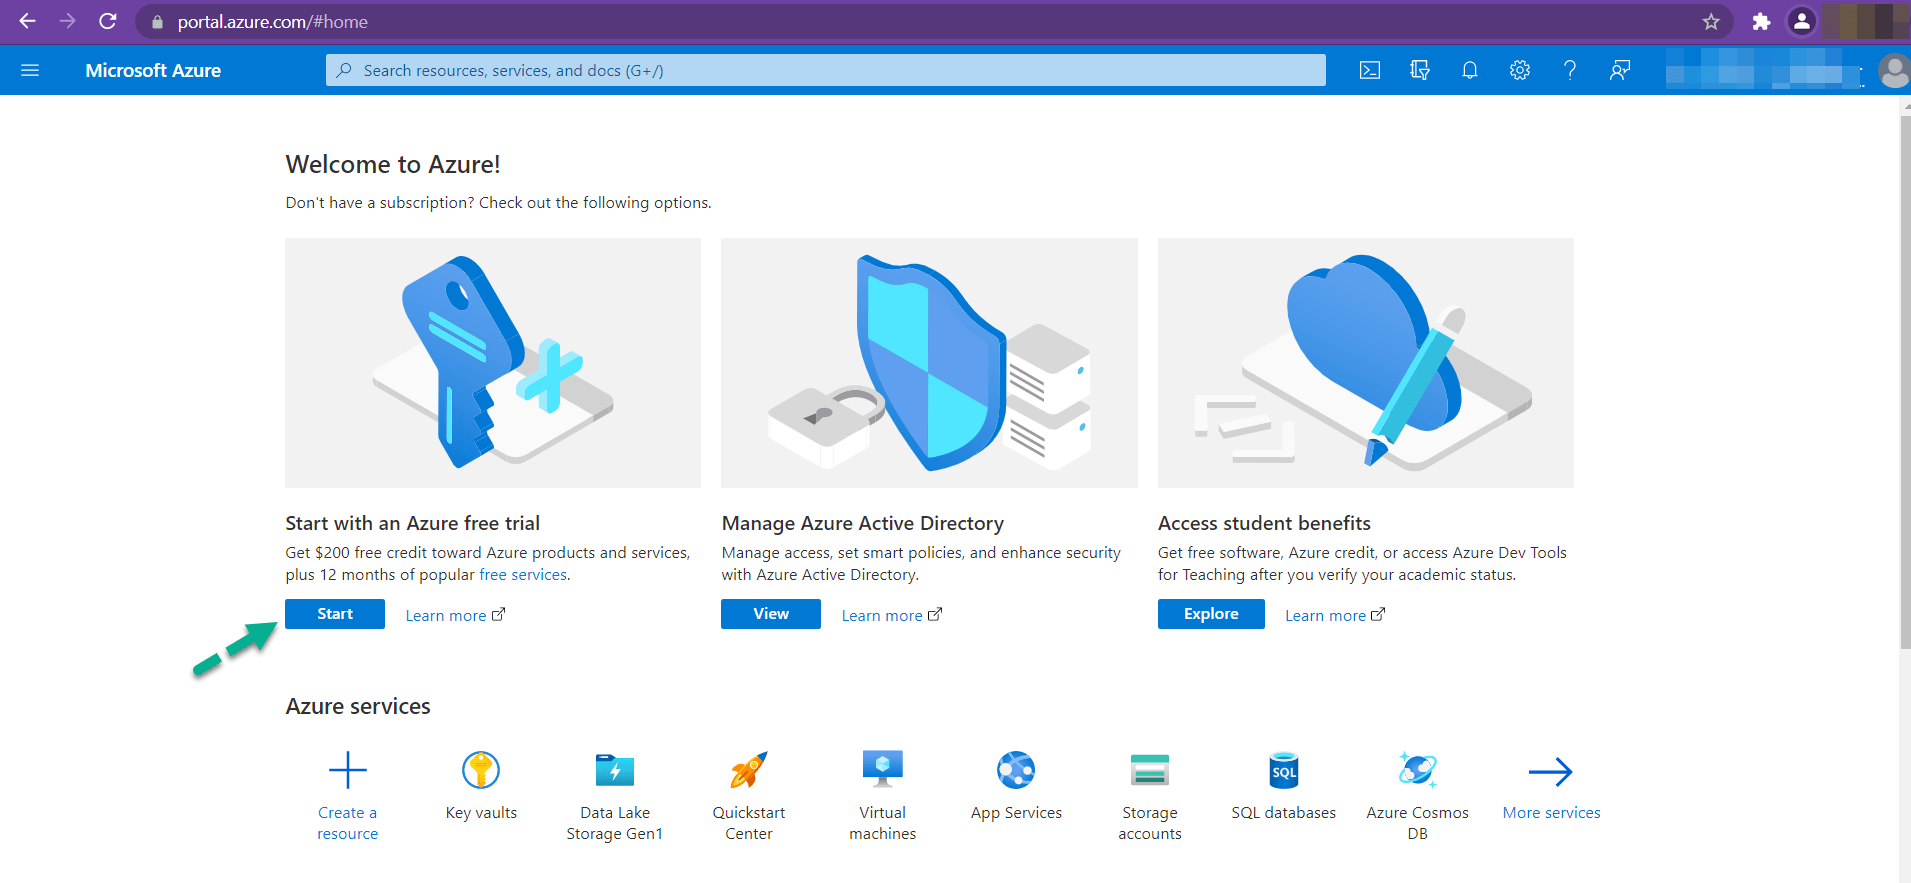
Click here to know more about Azure free services.
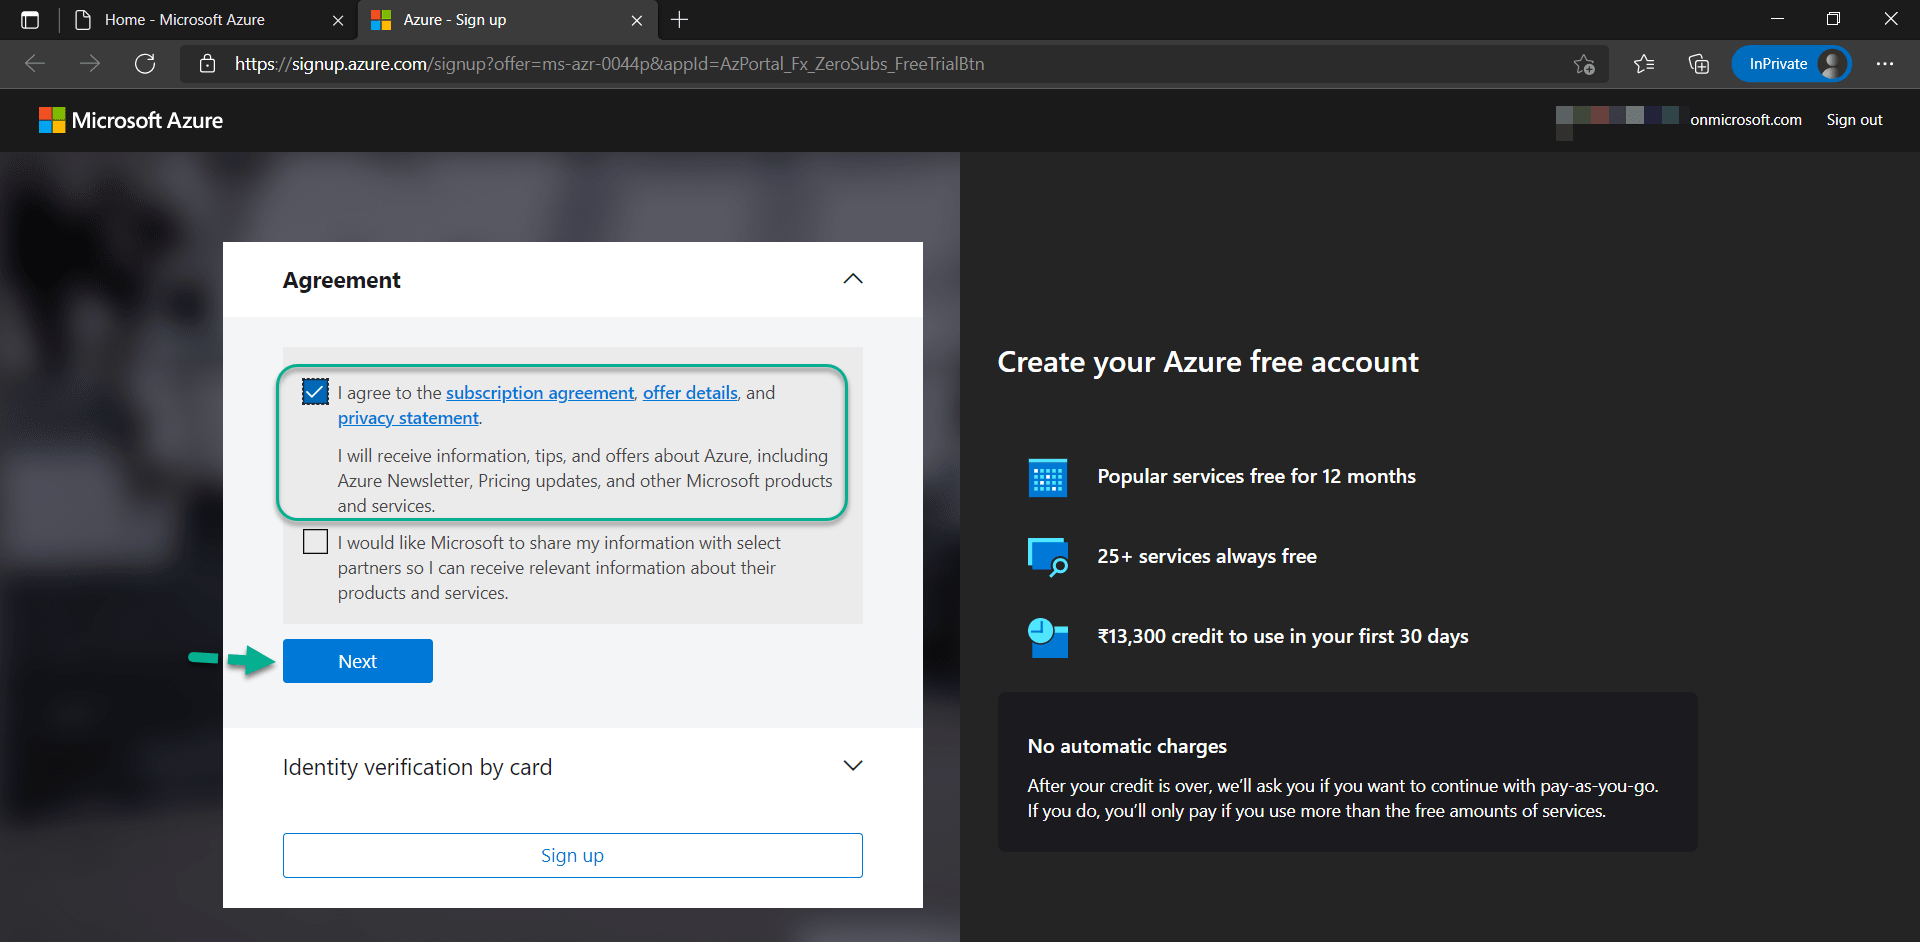
Step 6: Select I agree to the subscription agreement, offer details and privacy statement.
Click on Next.
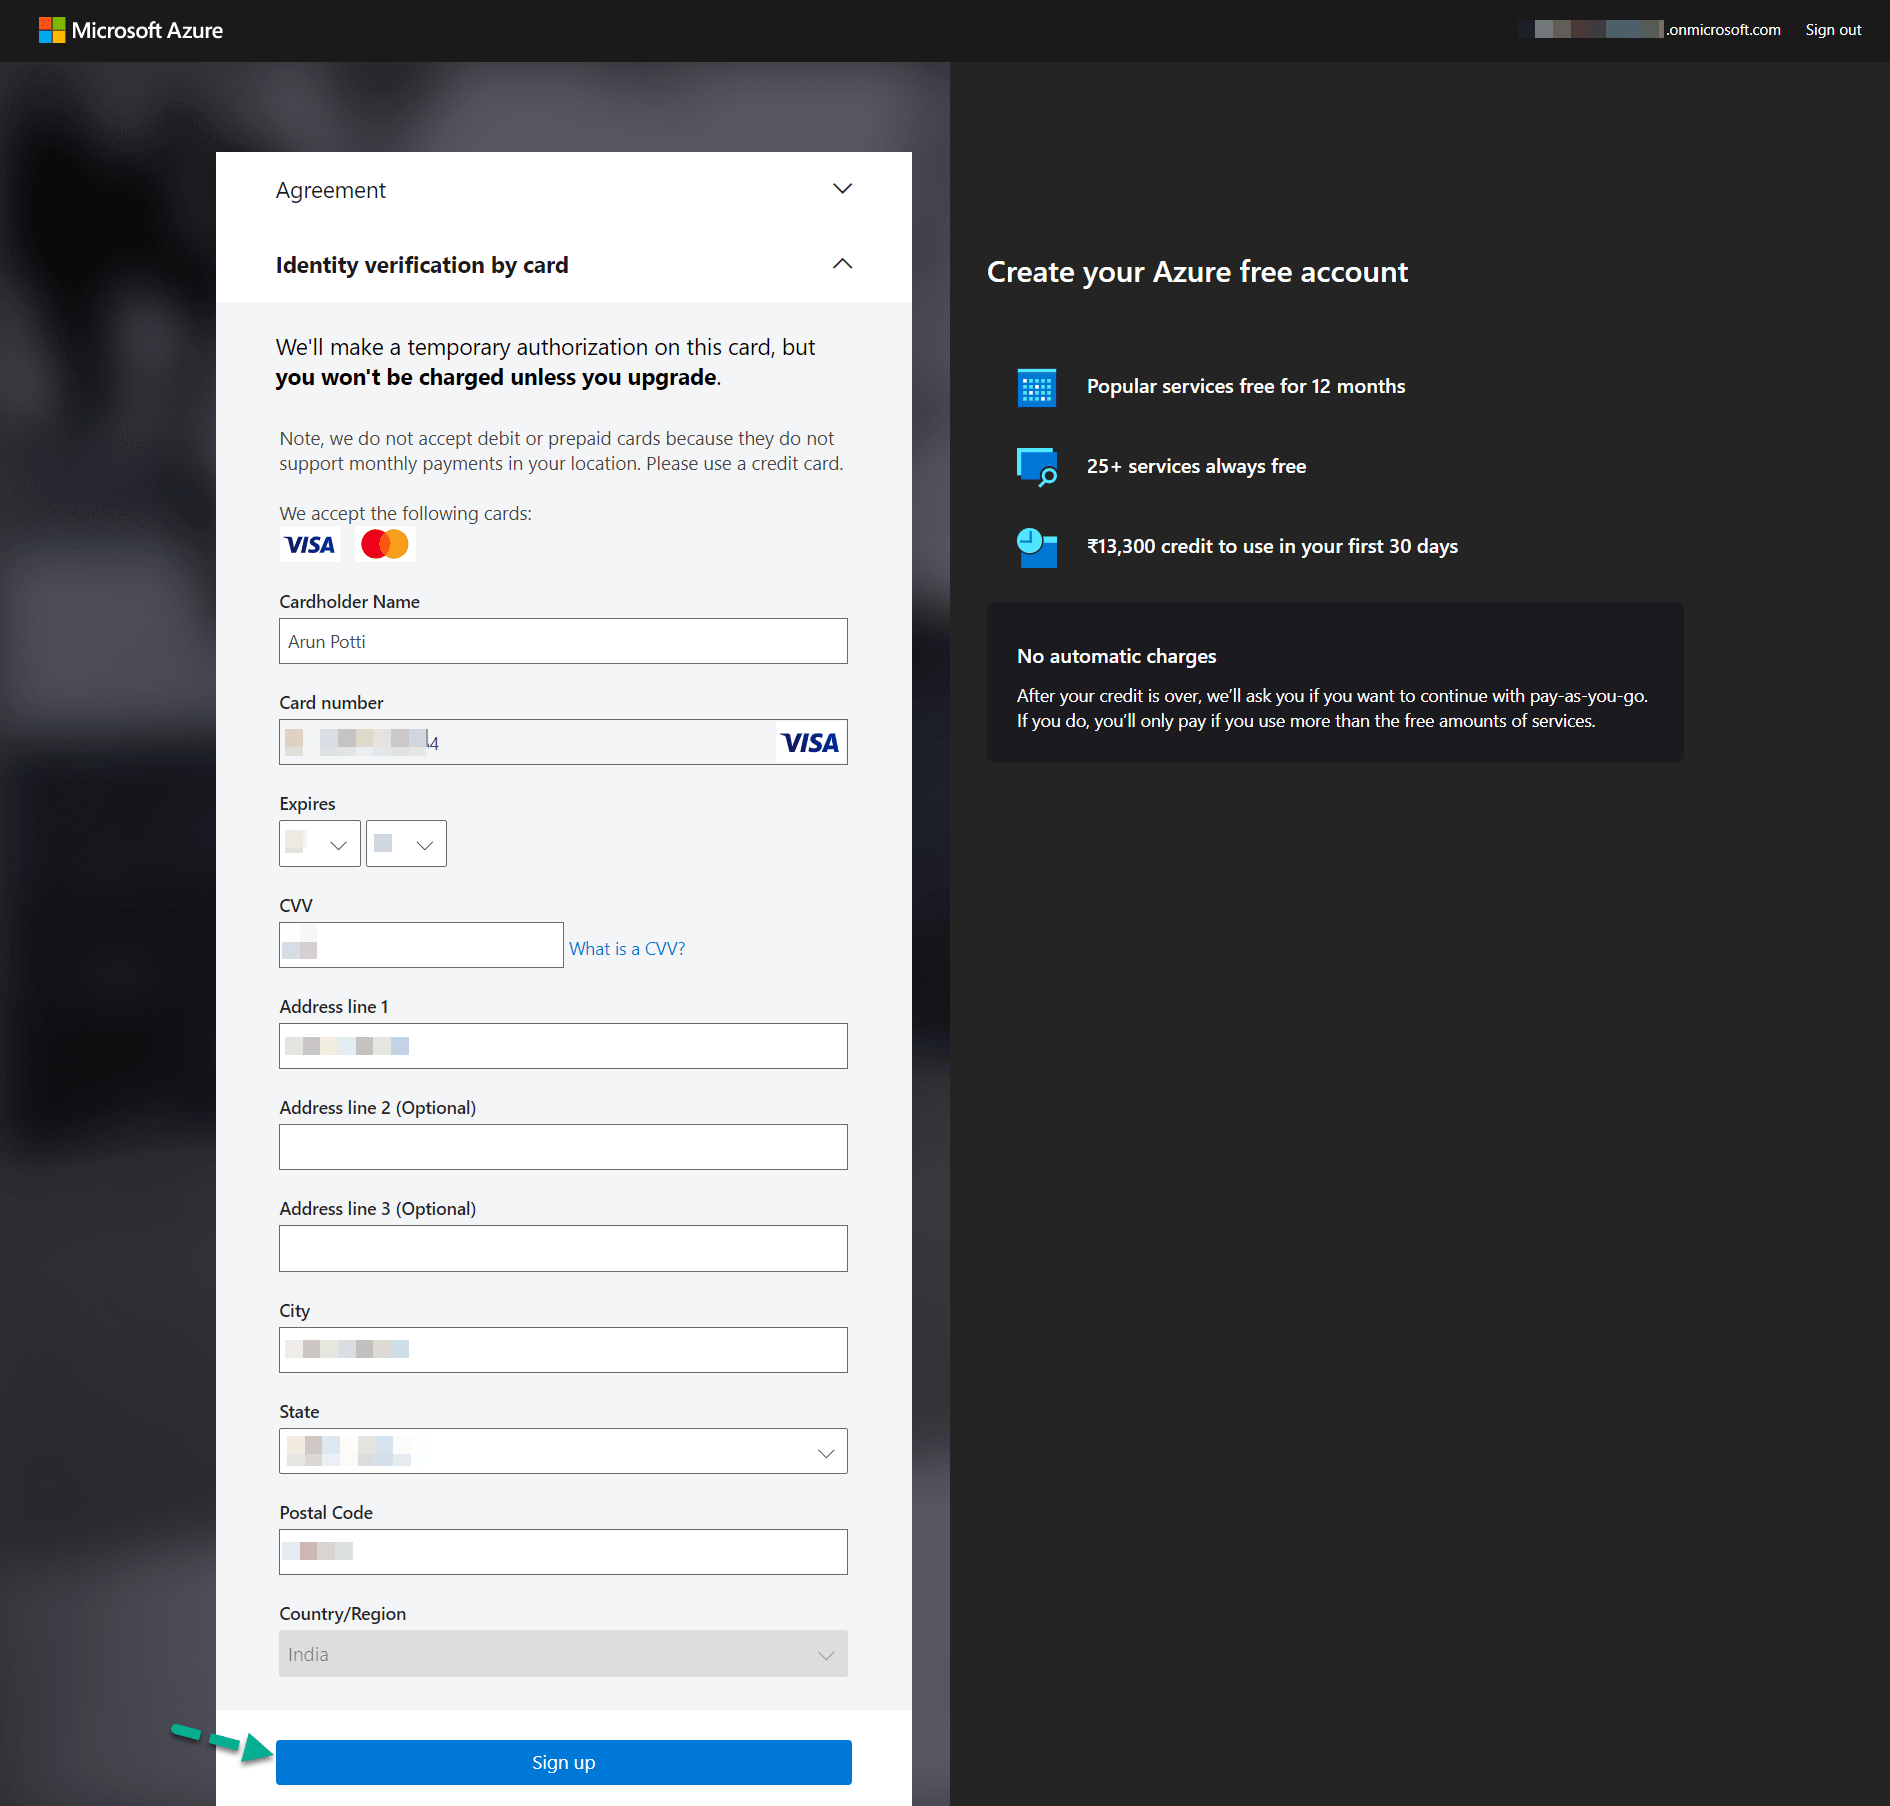
Step 7: Provide your Credit Card details and all other mandatory details mentioned in the below screen.
Click on Sign up.
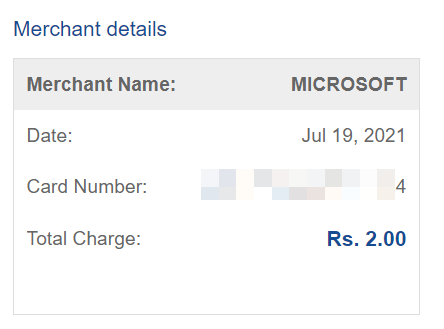
Step 8: Now, you will be Navigated to Payment page, pay the amount, where a nominal amount will be deducted from your Credit Card.
Here, INR 2 has been deducted from my Credit Card.
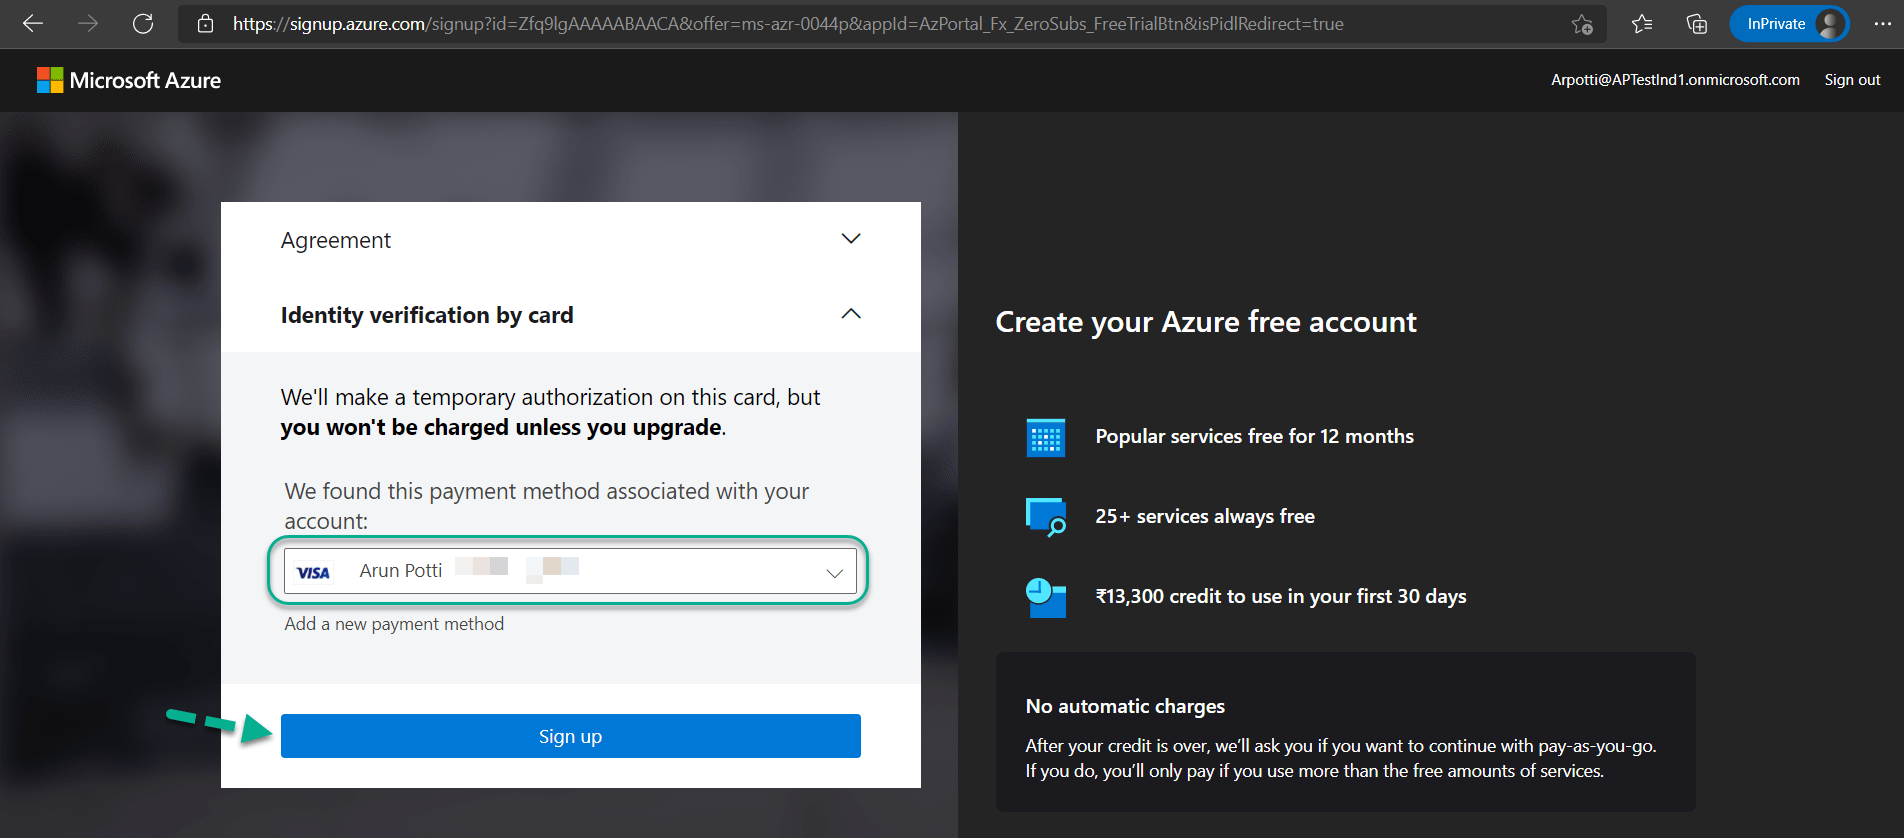
Step 9: After the successful Payment, it will be Navigated to the below screen.
Choose your Credit Card Details in the Payment Method Drop down from where the amount has been deducted and click on Sign up.
Step 10: You will be redirected to the below page and will have access to Azure Services.
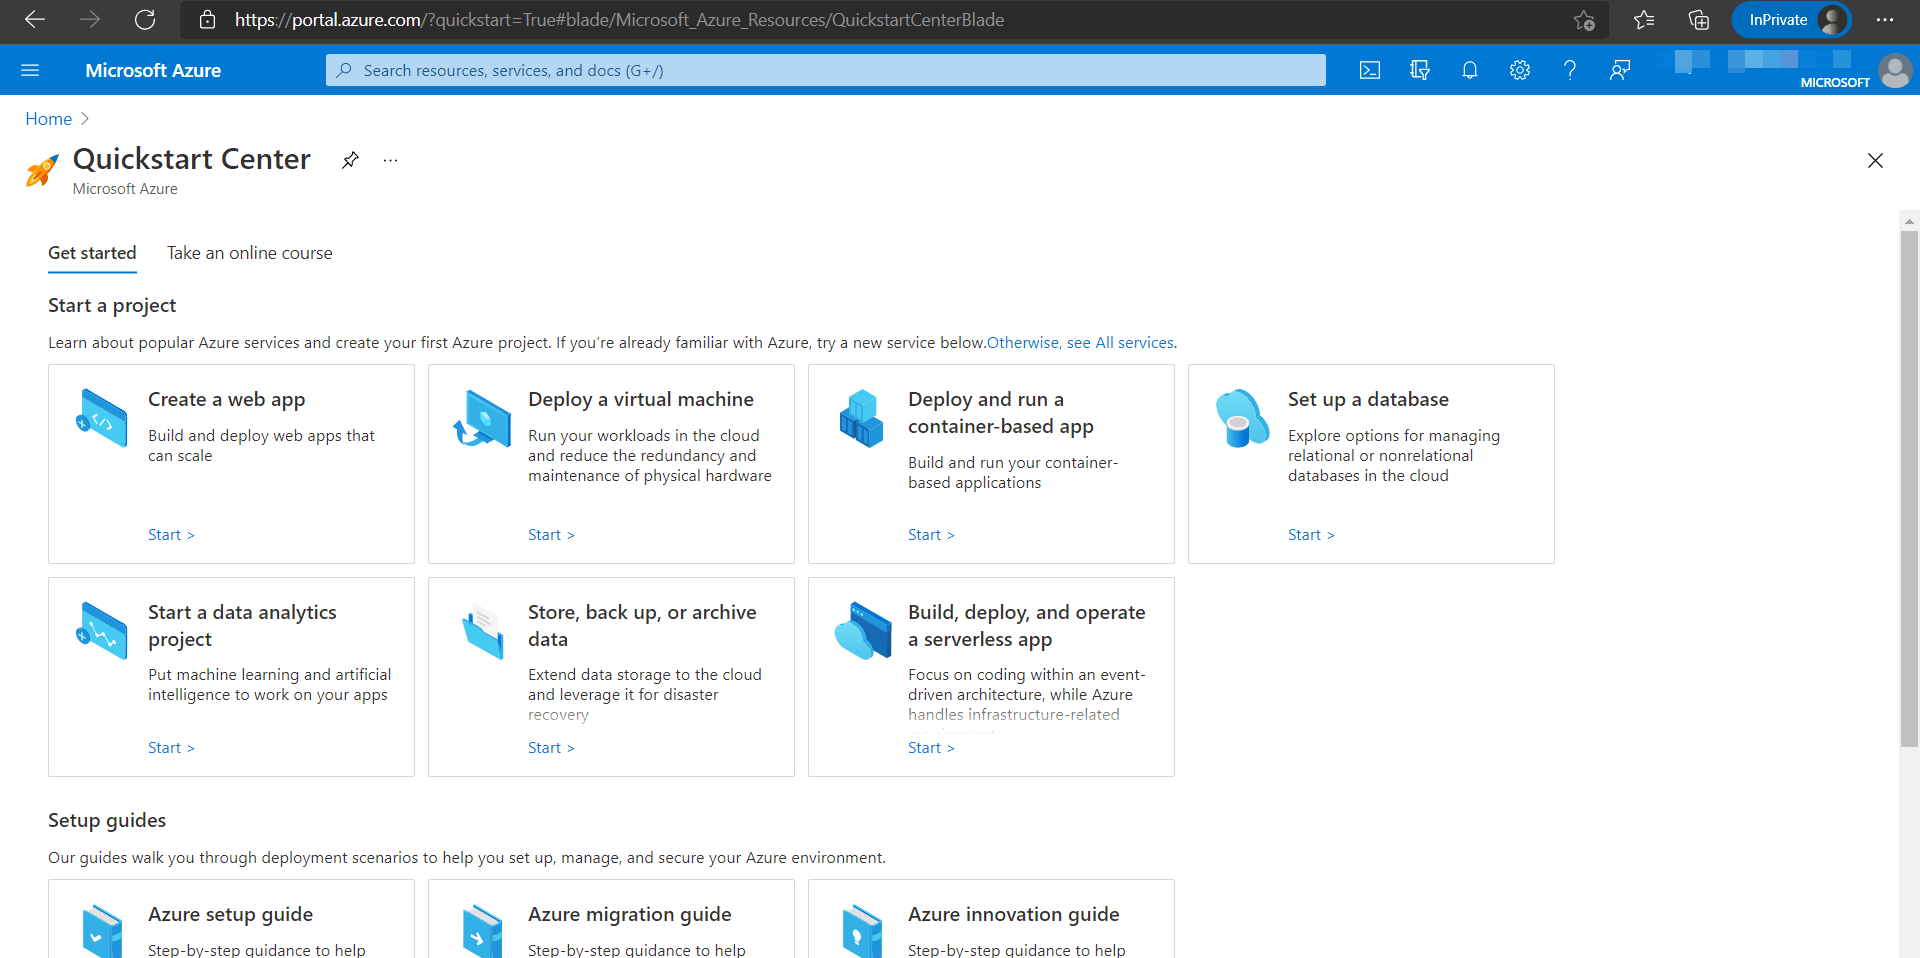
You have successfully created Azure Trial account and explore the Azure features.
Please share your valuable feedback on this article.
Discover more from Arun Potti's Power Platform blog
Subscribe to get the latest posts to your email.